
Screen Printing Process


We often get asked about how our prints are made, so we thought we’d share a bit about our process. Our prints are made by screen printing which is a stencil based printing process. We love screen printing for it’s ability to layer colours & textures, the density of the print, and the way we can print onto a variety of materials; pretty much anything as long as its flat!
The screens used for screen printing are usually made from wood or metal, and the mesh can be anything that ink can pass through. You can have a go at screen printing at home by stretching a bit of open weave fabric over an old picture frame (happy childhood memories for me right there, and lots of tutorials on the internet to be found!) The screens we use are made of aluminium, they’re strong and sturdy and won’t warp or crack with repeated washing and drying. They’re tightly stretched with a fine nylon mesh; the finer the mesh the greater the detail that can be achieved.
Images can be put on the screen in a variety of ways, the most straight forward way is to simply cut a stencil from paper and place it on the back of the screen before printing. You won’t get many prints before the paper breaks down, but its a great way to experiment and try out ideas. Shapes can also be masked out with tape, or anything thin and flat really!
Making a positive
We mostly use a photographic process to create a stencil on the screen. This is a bit more time consuming but gives a really crisp and durable stencil which we can print through many times. For this type of stencil we first need to make a ‘positive’ which is a high contrast black and white image, one for each colour layer of the print. The black areas of the positive will create space where the ink can be pushed through the mesh, and the white parts of the positive will be blocked. A positive can be made of anything that will block light, e.g. ink or pen on tracing paper, cut out paper shapes, thin objects like fabric or leaves. It’s fun to experiment. To make our positives we begin with hand made paper cuts, and use ink on tracing paper to create fine detail (you can read a more detailed description of our design process here). We then scan everything into the computer for any final tweaks and use a black & white laser printer to print the final positives onto thin copier paper. Light can pass through the paper but will blocked by the toner during the exposure process.
Positives drawn with pen & ink
A paper-cut positive and the print it produced
Paper-cuts next to the finished print
Screens drying in the sun
Exposing images to screen
First the mesh of the screen is coated with a thin layer of UV sensitive emulsion and left to dry. We then place the screen and positive onto our UV exposure unit. A strong vacuume holds the screen and positive tightly together whilst UV light is shone through the positive at the screen for a set amount of time. When the light hits the screen the black areas of the positive block the light and the white areas allow the light through to harden the emulsion. When the screen is then rinsed with water the soft emulsion washes away, the hardened emulsion remains and the image is revealed! A separate screen must be made for each positive/colour of the print. A final blast of UV light to solidify the image and the screens are ready to print…
Inks
We use high quality water based acrylic inks to make our prints. They’re better for our health than oil based inks (no solvents!) whilst still being long-lasting and giving great ink coverage. We mix the ink with a screen printing medium which helps the ink to flow and extends the drying time whist printing. We spend quite a lot of time mixing and testing colours before printing, a tiny drop of one colour in the mix can completely change the feel of a finished print. We’re both still learning about colour theory, and enjoying experimenting with colour mixing. We’re gradually building up a collection of swatches we’ve mixed and samples of colours combinations, its fun going through them and taking inspiration for new prints…

Our paper cutting & ink mixing area
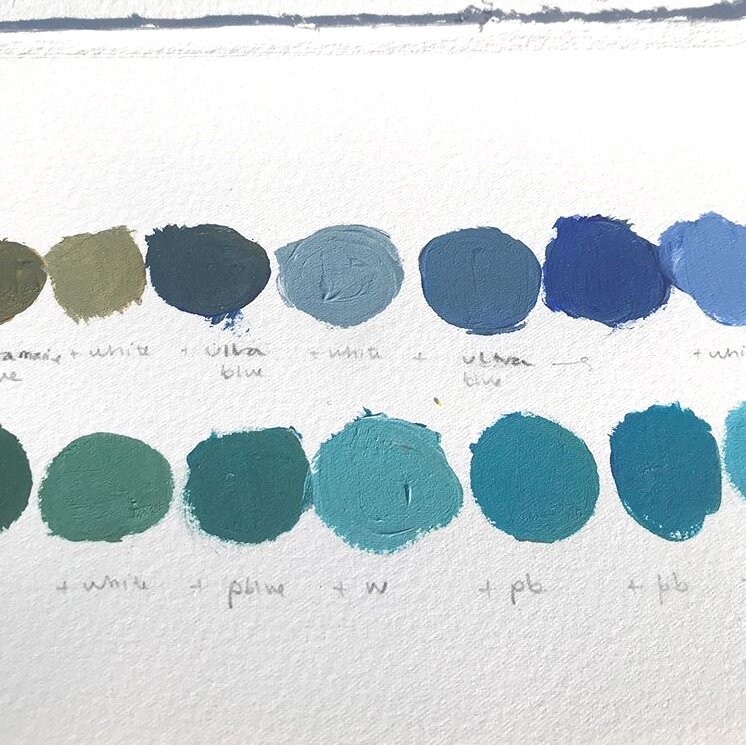
Colour testing…

Ink mixing

Screen ready for printing
Printing
We print all our paper prints on a small manual screen bed in our studio. The screen is locked in to place by the frame on top of the bed. The frame is hinged to allow the screen to be lifted up and down, keeping it in exactly the same place each time it’s lowered. This is very important as the different screens need to be printed one at a time, lined up precisely each time.
To print we use a squeegee to push the ink through the mesh and onto the paper below. The squeegee must be held at the correct angle so only the corner of the blade is in contact with the screen and paper below and correct pressure must be applied (too little pressure and the print will be faint or patchy, too much and the ink may bleed) As the ink is acrylic, printing must be done swiftly before the ink dries in the screen. A grey winter’s day (with the heater off and hats on!) is the perfect printing weather. It’s a process you just have to get a feel for - practice makes perfect!
Once the first colour layer is printed and dry, it’s time to print the next. It’s important the different layers of the print line up on top of each other perfectly so the image looks right, this is called ‘registration’. To position the different layers of the print we use an acetate sheet which is secured in place with tape down one side. We print onto the acetate then the paper can be placed underneath and moved around until it lines up perfectly with the image above. Then we flip the sheet back and print. The print bed has a vacuum; tiny holes drilled in a grid over the surface of the bed which air is pulled through (like a reverse air hockey table…) When the screen is down the vacuums comes on and holds the paper perfectly flat and still whilst printing. This stops the paper sticking to the screen and allows for tight registration. Layers are built up one at a time, each one registered and carefully printed. You can see a video of us printing ‘Nighttime Sea’ here. It’s still pretty magical to us watching the image appear as the layers go down!
The screen bed in our studio
Close up of an image on a screen
Using a squeegee to push ink through the screen
Three layers of colour make up this print
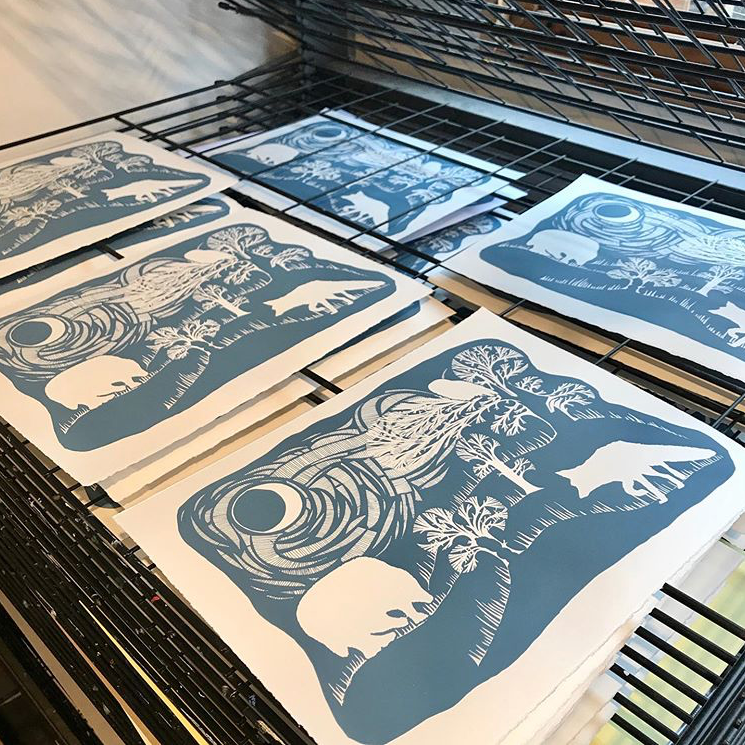
After printing we scrape all the excess ink from the screen and put it back in the pot to use next time. We wash the screen carefully to get rid of any trace of ink from the mesh; any ink left to dry in the screen will block it and would mean stripping the image off and starting again… We leave the prints on the rack to dry overnight then carefully check over each one for any misprints. Only prints we’re 100% happy with make it into the edition. We don’t just throw away the mis-prints though! We cut them up and turn them into labels for our packaging or note cards to send out with orders. We also use misprints to print over when testing a screen or colour, and sometimes the unplanned and unexpected combinations this gives become inspiration for new compositions and colour combinations (like this!)
Now all that’s left to do is sign & number each print. We produce our prints in limited editions, which means there’s a set number of each design and once that design has sold out no more will be made. Each print has a number which shows its unique place in the edition and guarantees it’s a Folded Forest original!


You can see our range of limited edition prints here. If you have any questions about screen printing, our print process or otherwise please feel free to contact us, we’d love to hear from you :) hello@foldedforest.co.uk.